A commercial building’s paint job is a significant investment. Clients expect a finish that looks professional and stands up to years of weather, foot traffic, and industrial wear.
The difference between a project that fails in a season and one that lasts a decade often comes down to what happens before the first bucket of paint is opened.
Surface preparation is the foundation of any durable, high-quality commercial paint job. Skipping or rushing this phase leads to peeling, blistering, and costly do-overs.
This guide outlines the non-negotiable steps to prepare commercial surfaces for a flawless and long-lasting finish.
The Importance of Surface Preparation for Commercial Paint Job Longevity
Why It Matters More Than the Paint Itself
Commercial substrates like concrete, steel, drywall, and masonry present unique challenges. Unlike residential walls, these surfaces are exposed to industrial pollutants, heavy equipment, and extreme temperature swings.
A proper prep process ensures the coating has a clean, sound, and properly profiled surface to grip.
Without it, even premium paint will fail to adhere properly, leading to chipping, flaking, and moisture intrusion that damages the building envelope.
The Cost of Skipping Prep Work
Professionals understand that time spent preparing surfaces is time saved on callbacks. For a commercial painting project, the expense of returning to a site to repair failed paint, including scaffolding, containment, and labor, far exceeds the cost of thorough prep.
A well-prepared surface can extend the lifespan of a paint system from 3 to 5 years up to 10 to 15 years, directly impacting the building owner’s bottom line.
Cleaning and Pressure Washing
Before any repairs or sanding can begin, the surface must be free of contaminants.
Commercial buildings accumulate far more than simple dust. Industrial grime, grease, oil, bird droppings, mold, and chemical residues act as bond breakers between the paint and the substrate, causing immediate adhesion failure.
High-Pressure Washing Techniques
For most exterior surfaces, a pressure washer operating between 3,000 and 4,000 psi is standard.
The water temperature is also critical; hot water (up to 200 degrees Fahrenheit) combined with a specialized detergent cuts through grease and oil far more effectively than cold water alone.
A 15- to 25-degree nozzle provides the right angle for cleaning without damaging the substrate.
- Exterior concrete and brick: Use a surface cleaner attachment for even coverage and to avoid streaking. Apply a masonry cleaner to neutralize efflorescence (white salt deposits).
- Metal surfaces: Avoid high pressure that might force moisture behind panels. Use a foaming soap and rinse gently.
- Interior walls and ceilings in commercial kitchens or factories: De-greasing with a heavy-duty alkaline cleaner is mandatory before rinsing.
Assessing and Repairing Surface Damage
Once the surface is clean and dry, a thorough inspection is needed.
A visual check alone is not enough; commercial painters in Virginia often use tools like a hammer for sounding hollow spots in render, or a moisture meter to check for trapped water.
Every defect must be addressed before primer meets the wall.
Common Commercial Painting Substrate Repairs
The types of damage vary by material. Concrete and brick often suffer from spalling (flaking), cracks from settlement, and open mortar joints.
Drywall in office settings may have impact damage from dollies and furniture. Metal panels can have rust, dents, and oil-canning.
- For concrete and masonry: Chisel out loose material, fill large cracks with a hydraulic cement or epoxy mortar, and allow proper cure time. Use a synthetic patching compound for smaller holes.
- For gypsum board (drywall): Tape and float joints with a setting-type compound. Apply a stain-blocking primer over any water stains to prevent them from bleeding through the new paint.
- For metal: Grind rust down to bare metal. Apply a rust-inhibitive primer and fill any deep pitting with an automotive-grade body filler.
Scraping and Sanding Old Paint
Loose, peeling, or chalking paint must be removed to provide a uniform, sound surface.
If old coating is not addressed, the new paint will adhere to the peeling edges, causing premature failure.
The goal is to create a surface profile with the right anchor pattern for the new paint system to grip.
Methods for Paint Removal and Profiling
The approach depends on the extent of the failing paint and the substrate. For areas where paint is already blistering, scraping with a wide putty knife is the first step.
For larger commercial surfaces, more aggressive methods are efficient.
- Hand sanding and pole sanding: Best for spot repairs and feathering edges. Use 80- to 100-grit paper for paint removal.
- Power sanding (belt or orbital): Effective for flat metal or wood surfaces but can leave swirl marks on softer substrates.
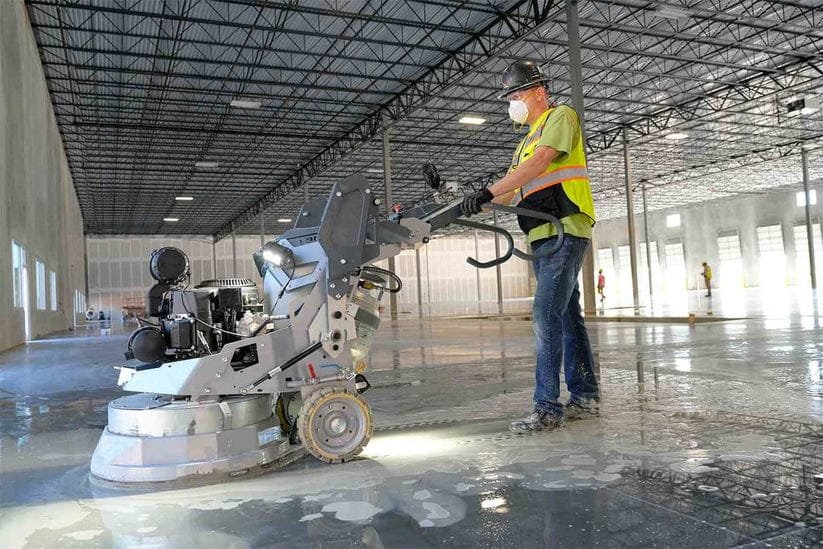
- Needle scalers and grinders: Used for heavy rust and thick coatings on steel and concrete.
- Abrasive blasting: The gold standard for large commercial steel structures. Sand, crushed glass, or garnet media creates the perfect anchor profile but requires extensive containment to comply with environmental regulations.
Practical Tips and Examples
Knowing the theory of preparation is one thing; applying it correctly on the job site separates amateurs from professionals.
Two areas that often cause confusion are primer selection and protecting the surrounding property.
Choosing the Right Primer
The primer is the bridge between the prepared surface and the topcoat. The wrong primer can cause the entire system to fail.
- For bare metal: Use an alkyd or epoxy primer that provides corrosion resistance.
- For drywall and plaster: A latex PVA (polyvinyl acetate) primer seals the porous surface, ensuring a uniform topcoat sheen.
- For glossy or stained surfaces: A high-adhesion or stain-blocking primer is essential.
- For masonry: A block filler primer fills the tiny pores and air pockets, creating a smooth, even base.
Protecting the Site and Surroundings
In a commercial setting, the job site remains active. Protecting floors, furniture, machinery, and landscaping is a critical safety and quality step.
Use heavy-duty 6-mil plastic sheeting and rosin paper for floors and countertops. For windows and trim, quality blue painter’s tape offers clean lines without residue.
Always ventilate the area and use dust barriers to contain airborne debris from sanding or scraping.
Conclusion
Surface preparation is not a tedious prelude to the main event; it is the main event itself.
Every minute invested in cleaning, repairing, scraping, and priming pays dividends in the finished appearance and long-term durability of the paint system.
A building that looks immaculate on day one and stays that way for years is a direct result of thorough surface preparation.
It is the invisible layer of quality that defines a truly professional commercial painting project.
While DIY surface preparation is possible for small touch-ups, large commercial projects demand expert knowledge, specialized equipment, and a commitment to safety.
Attempting to prepare a high-rise facade or a 100,000-square-foot warehouse without the correct tools or training often leads to expensive mistakes and scheduling delays.
If you are planning a commercial painting project and want a finish that lasts, contact our team of professional commercial painters in Virginia.
We provide free on-site assessments to evaluate surface condition, recommend the ideal preparation process, and deliver a durable, beautiful paint job that protects your investment for years to come.


0 Comments